
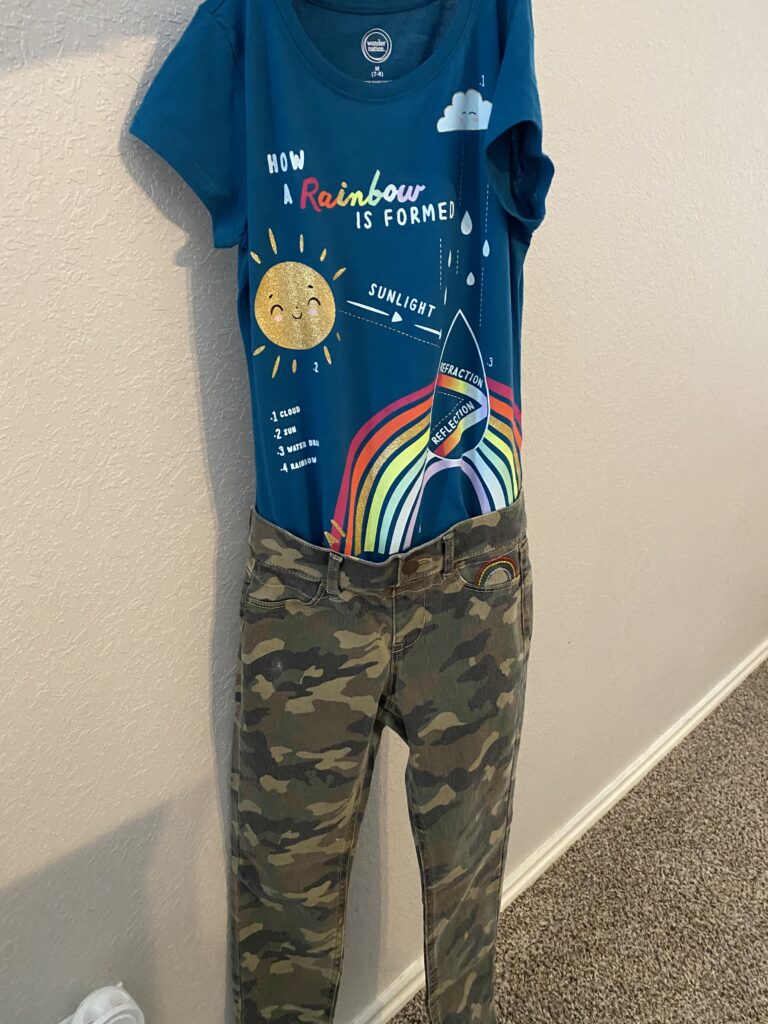
When I first started learning how to sew adaptive clothing, it wasn’t because I wanted to start a new hobby. My daughter has a genetic condition that causes severe developmental delays and physical disabilities. She was about six when I ran out of solutions. Everything I found online was expensive, generic, and didn’t fit her specific needs.
So my husband and I figured it out ourselves. Neither of us had any sewing experience. What we came up with is simple, it works for any age, and you don’t need to know anything about sewing to do it.
This tutorial shows you exactly how we make it. A shirt and pants sewn together at the waist, with a snap opening at the shoulder for easy dressing and IV access during hospital stays. That’s it. No pattern. No experience required.
Adaptive clothing is clothing designed to be easier to put on and take off. Especially for people with physical disabilities, limited mobility, or medical needs. That can mean magnetic closures instead of buttons, open-back designs, or in our case, a one-piece outfit that stays on and gives easy access.
Before I started to learn how to sew adaptive clothing myself , I looked online for ready-made options. I found a few onesie-style outfits that resembled a t-shirt with snaps on the bottom for legs. All of the options that came close to what I needed were well over $100 per outfit and still wouldn’t have worked for my daughter.
Making it yourself costs a fraction of that if you already own a sewing machine. And once you make one, you’ll look at every shirt and pair of pants as a potential next adaptive outfit.
What You Need
You’ll need very little. This is not a complicated sewing project.
- Sewing machine
- Thread (match your fabric color or use a bold color for a different look)
- Denim machine needle if sewing into denim or thick fabric
- One shirt or your top of choice
- One pair of pants, leggings or shorts
- Kam snaps and snap pliers
- Scissors
- Straight pins
Watch Before You Start
This short video walks through the process of how to sew adaptive clothing. The written steps below go into more detail, but watching first will make every step easier to follow.
How to Sew Adaptive Clothing: Step by Step
This method works for any age and any size. My daughter is a teenager. We’ve been making these since she was six. The process is the same every time.
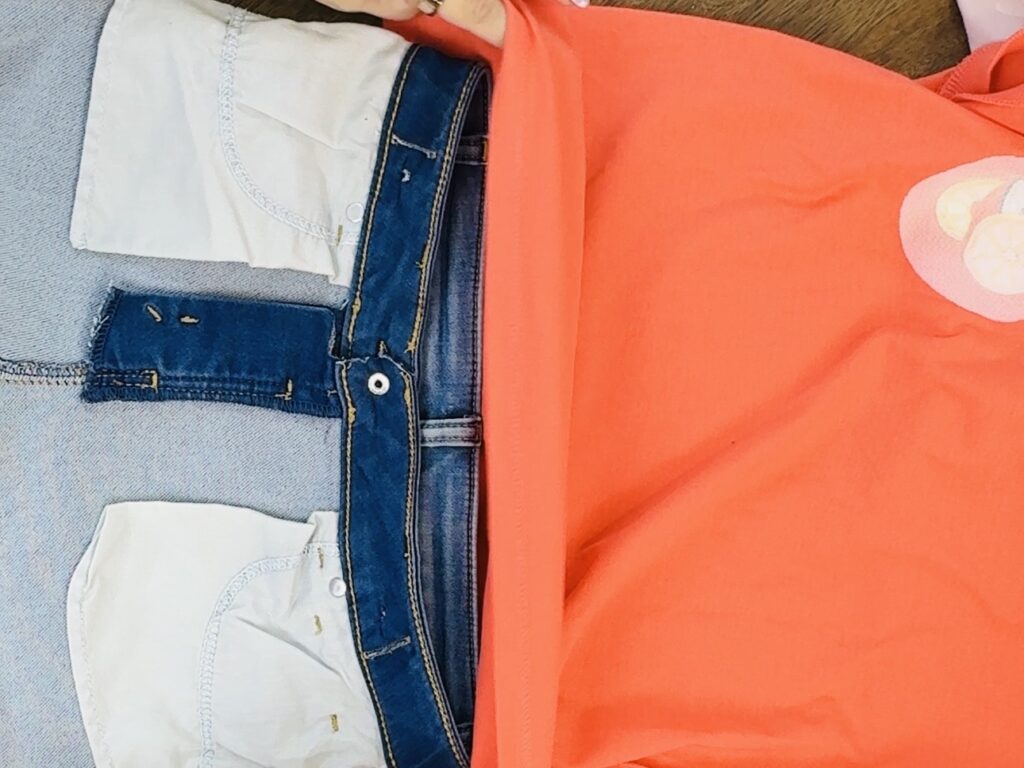
Step 1: Lay Both Pieces Flat, Inside Out
Turn both the shirt and the pants inside out and lay them flat on a surface. Front to front, back to back. Make sure they’re facing the same direction — you don’t want to sew the back of the shirt to the front of the pants.
If your child has a longer torso, now is the time to adjust. You can slide the shirt lower on the pants so the finished outfit fits their body properly. Just inside the waistband is usually a good starting place.
Step 2: Pin the Shirt to the Pants at the Waist
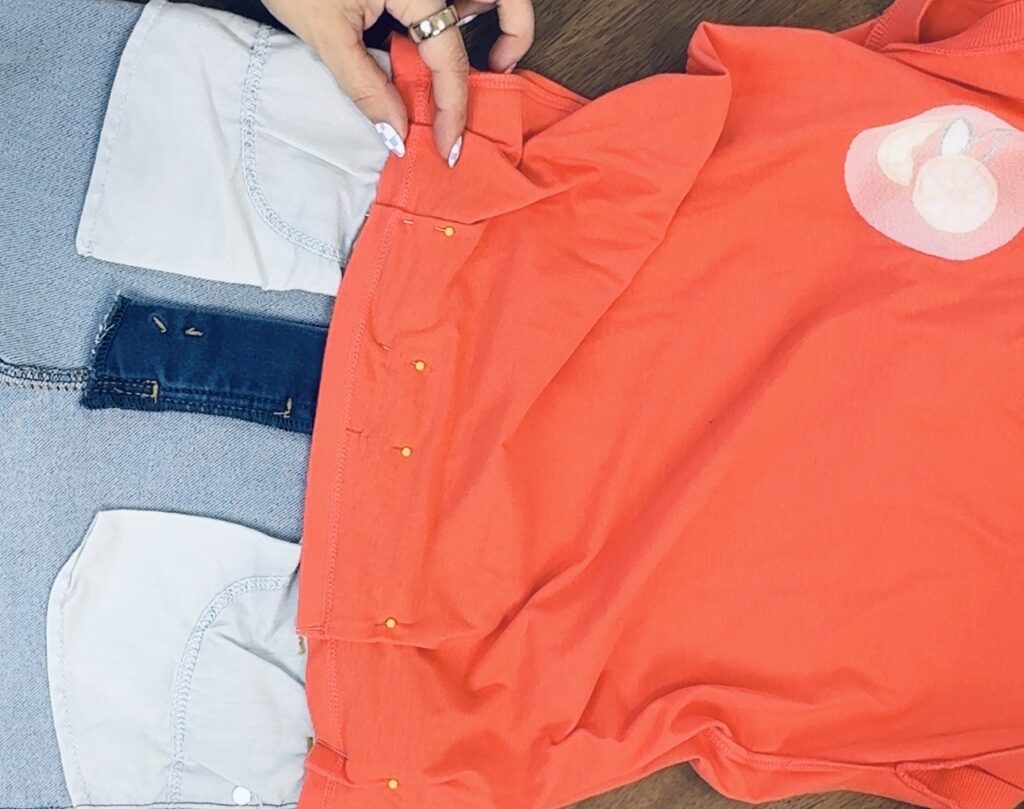
Start placing pins at the back. Match up the tags and back seams first. This keeps everything lined up. Then work your way around the waistband, placing a pin every 4 inches or so.
Use vertical pins. They’re much easier to pull out as you sew. Try to line up the side seams of the shirt with the side seams of the pants. It keeps the finished outfit from twisting.
Matching side seam to side seam is the single most important thing you can do to keep the outfit looking even once it’s finished.
Step 3: Sew Around the Waistband
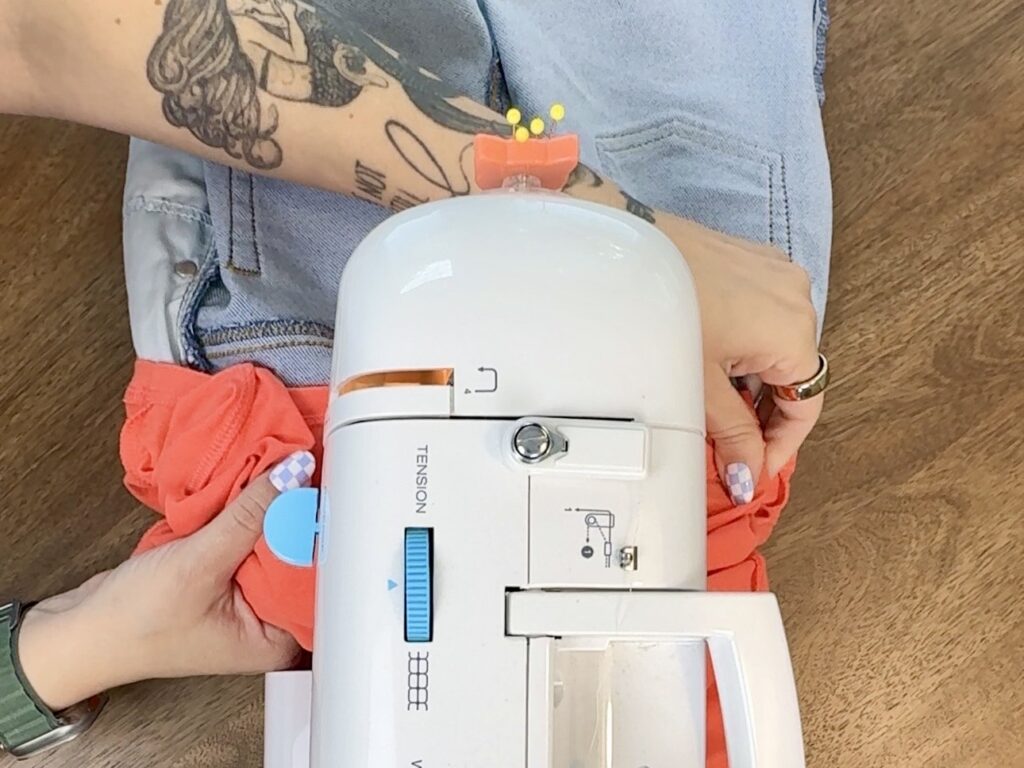
Before you start, remove the storage arm from your sewing machine if it has one. This gives you room to slide the waistband around the machine as you sew.
Slide the waistband under the presser foot and lower the needle. Sew slowly. Remove pins as you go and don’t sew over them. If you hit a thick seam or get close to a button, slow down even more and either sew just below the button or remove the button before you get there.
Once you’ve gone all the way around, snip the thread and pull your nearly-finished one-piece free. Turn it right-side out and check the seam. It should lie flat all the way around.
Step 4: Cut the Shoulder Opening
This is the access point. It’s what makes dressing easy and what gave us IV access during hospital stays without having to disconnect them when changing diapers or outfits.
Cut from the collar down to the shoulder seam on one side. Roll the raw edge under and sew along the fold. This keeps the fabric from fraying in the wash.
One shoulder is all you need. That’s what we do. If your child needs more access you can do both shoulders, but one has always been enough for us.
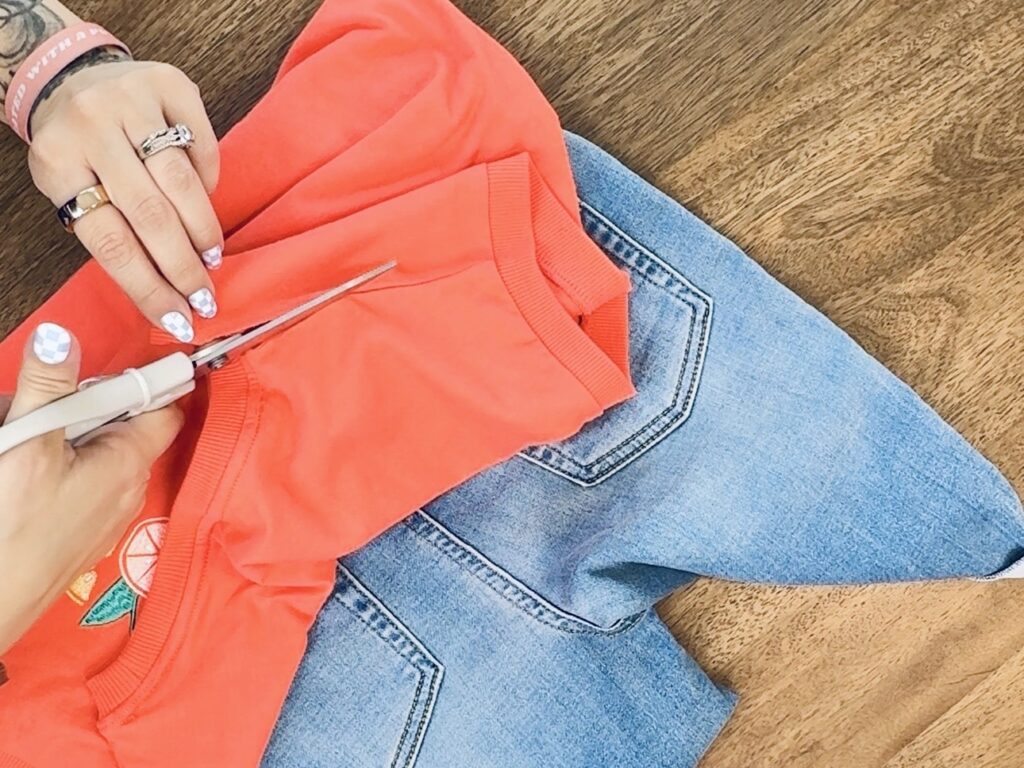
Step 5: Attach the Kam Snaps
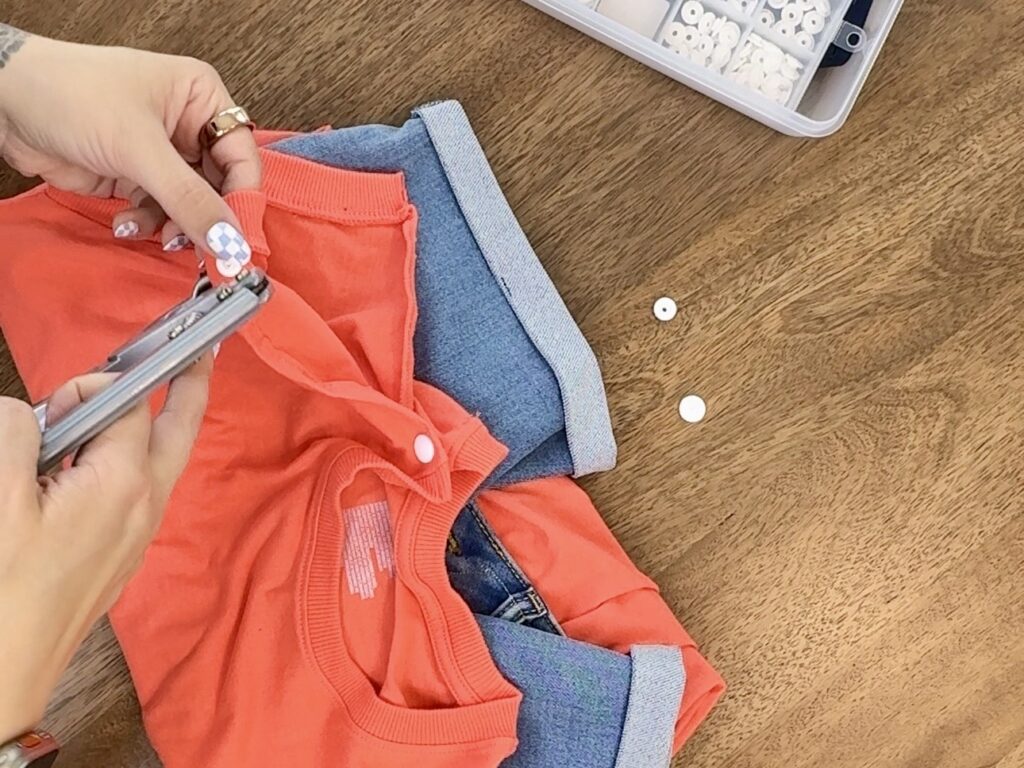
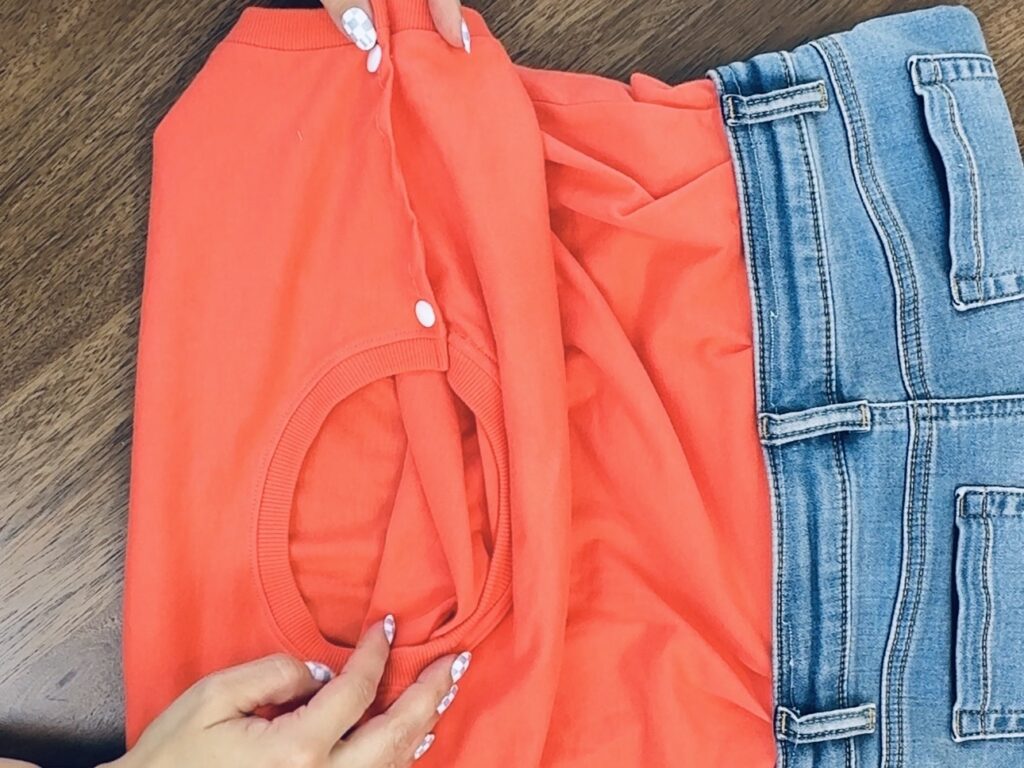
Place your Kam snap hardware where you want the closure and press down firmly with the snap pliers or snap tool. Do both sides so they connect. Each snap needs one male piece and one female piece. Press one on each side of the opening so they connect when you close it.
That’s it. You just learned to sew adaptive clothing yourself. Turn the outfit right-side out, snap it closed, and you have an adaptive one-piece that costs less than most adaptive outfits on the market.
Things Worth Knowing Before You Start
- Don’t sew over your pins. It will break your needle
- If you’re sewing denim, use a denim needle
- Do a test run with an old shirt and old pants before you use the good stuff
- The waist seam does not need to be perfect. It will be hidden inside the outfit
- Wash the finished outfit the same way you wash the original fabrics
- Once you make one, the next one takes half the time
Is This Method Right for Your Child?
This works best for kids and teens who need a contained one-piece outfit, have caregivers helping with dressing, or need easy shoulder access for medical lines or devices. My daughter is a teenager and we still use this method.
This works well if your child:
- Removes their own clothing or diaper
- Needs a caregiver for all dressing
- Has a G-tube, port, or other access point that a shoulder opening would helpIs frequently in the hospital and hospital gowns don’t work
- Needs comfortable one-piece dressing without a onesie that’s too small
You may want a different approach if:
- Your child dresses independently and needs to open and close their own clothing
- You need a more formal or structured adaptive design
- Your child has sensory sensitivities to seams at the waist
Frequently Asked Questions About Sewing Adaptive Clothing
Do I need sewing experience to make adaptive clothing?
No. This tutorial was designed by two people with zero sewing experience. If you can sew a semi straight line, you can sew adaptive clothing. The waist seam doesn’t even need to be perfect. It ends up hidden inside the outfit.
What kind of clothing works best for this method?
Almost anything. We’ve done this with t-shirts, long sleeve shirts, leggings, jeans, and joggers. Stretchy fabrics can be tricky to sew with, but are the most forgiving looks wise. If you’re using denim use a denim needle or the machine will skip stitches.
Can I do this for an older child or teenager?
Yes. My daughter is a teenager and we still make these. The method works for any size because you’re working with clothes that already fit your child. You’re basically just connecting them.
What are Kam snaps and where do I get them?
Kam snaps are plastic snap fasteners you press in with a snap tool or pliers. They come in a huge range of colors, they’re very secure, and they’re much easier to work with than sew-on snaps. You can find them on Amazon. I’ve linked the ones I use in the supply list above.
Will the outfit hold up in the wash?
Yes. Wash it the same way you’d wash the original fabrics. If the shirt was machine washable and the pants were machine washable, then they will be safe. The Kam snaps are also washer and dryer safe.
How long does it take to make one?
The first one takes about 30-45 minutes. Once you’ve done it once, the next one takes maybe 20. It gets faster every time. I like to do it in stages. I’ll pair all the outfits together, then in one sitting I’ll pin each outfit together at the waist so they are ready to sew. Then when I have time to sew I can knock out 2-3 outfits at once in about 25 minutes.
Can I use this method for hospital stays?
Yes! This is actually one of the main reasons we use it. The shoulder snap opening gives access to lines and ports without having to unhook them to change a diaper or the outfit. We’ve used it through many hospital admissions.
This setup has saved us more times than I can count. In our living room and in hospital rooms. Once you make the first one you’ll start looking at every outfit as a possible new adaptive set.
Everything I used is linked below. If you try it, I’d genuinely love to know how it goes.